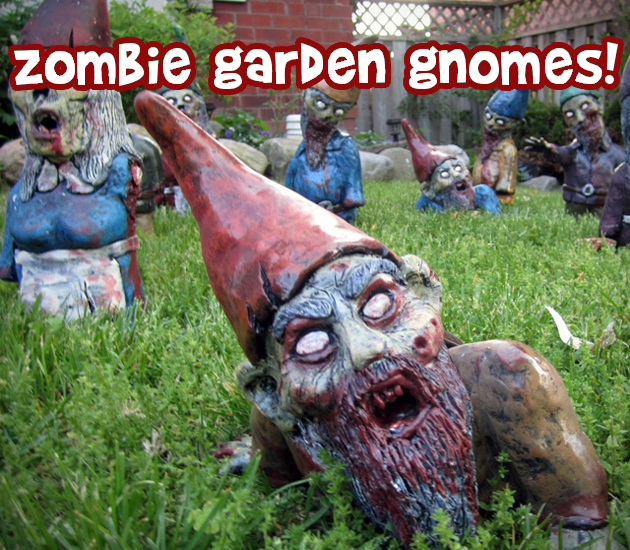
I found these awesome zombie garden gnomes over at Amazon.ca, but they are a little expensive. At $26.29 per Thumbs Up Zombie Garden Gnome I decided I didn't want to pay that price, but I definitely want some of these in my garden. Thank goodness Google has the answer for everything. I was able to find some tutorials on how to make your own zombie garden gnomes, and I think we should all try this out! I took the best pointers and have formed our very own, DIY Zombie Garden Gnome tutorial. These things are great!
Your first step is going to be picking up your materials and supplies. You can grab Garden Gnomes (any kind you like) at many stores like Walmart, the Dollar Store or even Home Depot. Pick your favourite little characters and let's turn them into zombies. Walmart Canada even had a garden gnome that was bent over, too funny! You could do it up that another zombie garden gnome has taken a bite out of his derriere. Definitely add some humour to this project. To do the transformation you are going to need:
- Bondo
- small mixing cup
- popsicle sticks
- outdoor adhesive
- acrylic craft paint in a few colours like flesh tone, black, blood red, and more
- acrylic crackle (medium)
- craft paint brushes
- spray sealer (clear enamel)
If you are repainting an older gnome, be sure to wash it with soap and water and then let it dry completely before you try performing this zombie transformation. Then you are going to want to take a look at your garden gnomes and decide where you want the blood and gore to be. I found a garden gnome that is holding a bunny, I know where my gore will be added. So, make your Bondo and get started on adding some texturized blood and gore.
To make Bondo:
Take your small mixing cup and follow Bondo's instructions to make the perfect solution. Usually the instructions are pretty simple. Make sure to get your Bondo applied perfectly quickly, so that it dries properly. Put Bondo around the mouth area for sure so you can paint it blood red later.
Then you are going to start painting! You will want to prime (or use white acrylic paint) over the Bondo areas. If your gnome is already painted, be careful you don't go over the already painted areas. They will be hard to get a perfect colour match to touch up. Once you have primed the Bondo areas, then you can start getting creative and turning them into blood and gore.
When you are all done painting, let your creation sit to dry for several hours. Once it is completely dry, you can use the clear enamel spray sealer to seal it all in and ensure that your Zombie Garden Gnome can endure the great outdoors. This process will take about 3 coats, but you must let it dry well between each coat or your zombie will feel tacky to the touch and it could make it look smudgy. While most might think these guys are only suitable for Halloween, I would honestly have my Garden Zombie Apocalypse set up all year round. What about you?
You could definitely make it interesting by putting little weapons in their hands or an arrow through their head. You will need to be creative with this. Drill a hole in their head or their hands to hold the weapons. What would a zombie garden gnome possibly use to protect itself? Maybe a fork or butter knife? What other small weapon-like items could you possible have laying around the house. Maybe you could even make them holding a sign like - "Enter At Your Own Risk" or "Beware Of Zombies". Just cut out a little piece of cardboard and have at 'er with a Sharpie marker. When you're done, glue the little sign to a popsicle stick and stick it into the hole you drilled in the gnome's hand. Voila!
There is a full instructable hereon how to make yourself a Zombie Garden Gnome starting with just a plain ceramic zombie. Sometimes you won't be able to find already painted gnomes, or perhaps you just want to completely customize yours.